
Cheesecake Lovers!
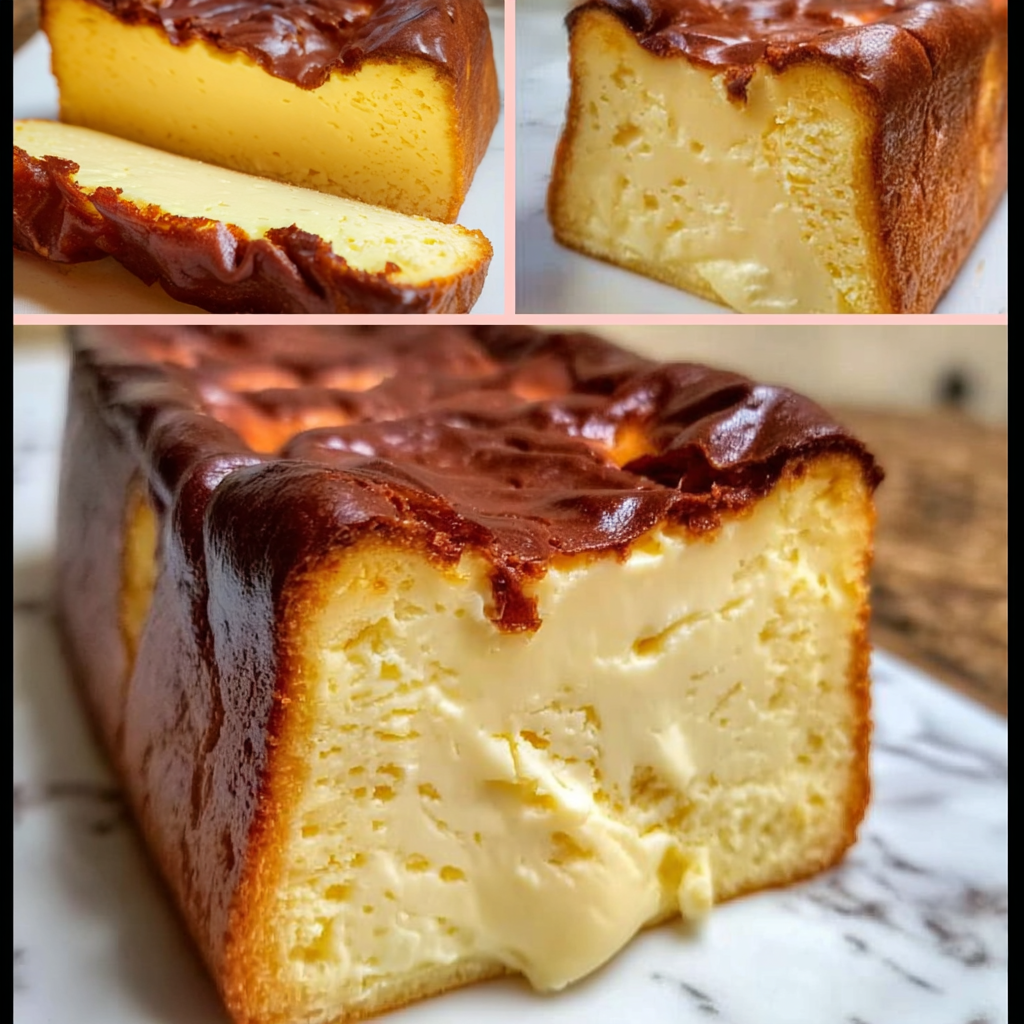
Are you ready for a dessert that’s rich, creamy, and oh-so-delicious? I absolutely adore making this small-batch burnt Basque cheesecake, and let me tell you—it’s a game-changer! This cheesecake is wonderfully easy to whip up and has a beautiful, caramelized top that adds an amazing depth of flavor. With just a handful of ingredients and minimal fuss, you can impress yourself and anyone lucky enough to share a slice with you. Let’s dive into this delightful recipe together!
Nutritional Benefits of Burnt Basque Cheesecake
Now, I know what you’re thinking—cheesecake might not sound like a health food, but here’s the twist! Cream cheese, while indulgent, contains calcium which is great for your bones. The heavy cream gives you a dose of vitamin A. Plus, you can enjoy it in moderation with smaller portions since this is a small-batch recipe. It’s all about enjoying life’s pleasures, right?
Adaptable Variations
- Gluten-Free Option: You can easily substitute all-purpose flour for cornstarch to make this cheesecake gluten-free!
- Flavored Variants: Want a little twist? Try adding some lemon zest or a splash of orange extract for a fresh zing.
- Lower Sugar: You can also use a sugar substitute like erythritol or monk fruit sweetener to keep the sweetness without the calories.
- Top it Off: Instead of mint leaves, serve with a drizzle of berry sauce or a sprinkle of nuts for added texture!
Your Easy Small-Batch Burnt Basque Cheesecake Recipe
Ingredients
- 16 oz (450 g) cream cheese, softened
- 2/3 cup (130 g) granulated sugar
- 3 large eggs
- 2/3 cup (160 ml) heavy cream
- 1 tablespoon all-purpose flour or cornstarch
- 1 teaspoon vanilla extract
- Fresh mint leaves for garnish (optional)
Instructions
- First things first, preheat your oven to 400°F (200°C). That way, it’ll be ready when we are!
- Next, line a loaf pan with parchment paper. Make sure it extends beyond the edges; this will make getting your cheesecake out super easy.
- In a large bowl, beat the softened cream cheese until it’s smooth and creamy, just like a dream!
- Gradually add the sugar, mixing until everything is well combined—this creates that luxurious sweet base.
- Now, add the eggs one at a time, giving it a good mix after each addition. We want that silky cheesecake consistency!
- Pour in the heavy cream and vanilla extract, and gently mix everything together.
- Sift the flour or cornstarch into the mixture, folding it in until it’s completely blended.
- Carefully pour the batter into your prepared loaf pan, smoothing the top so it bakes evenly.
- Time to bake! Pop it in the oven for about 40-50 minutes. You want the top to be beautifully browned and just a little jiggle in the center.
- Once done, take it out and let it cool in the pan to room temperature. Don’t rush this part—patience is key!
- After cooling, it’s time to chill. Pop it in the fridge for at least 4 hours (or overnight, if you can wait!) to let all those flavors develop.
- When you’re ready, use that parchment overhang to lift your cheesecake out, slice it up, and garnish with fresh mint leaves if you’re feeling fancy!
- Enjoy your cheesecake served chilled or at room temperature. Every bite is pure bliss!
Practical & Valuable Tips
- For best results, make sure your cream cheese is softened. This helps avoid lumps and gives you that smooth texture.
- Letting the cheesecake cool slowly helps prevent cracking, giving you a beautifully smooth, professional-looking finish.
- Remember to store any leftovers in an airtight container in the fridge. It should last for about 3-5 days, but trust me, it won’t last long!
- If you prefer a richer flavor, try using a bit more vanilla extract—who doesn’t love that!
- Slice with a warm knife for cleaner edges—dip it in warm water, pat dry, and then cut; it makes a big difference!
Equipment Needed
Here’s what you’ll need to get started:
- A loaf pan (9×5 inches works great)
- Mixing bowls
- A whisk or electric mixer to beat everything to perfection
- A spatula for folding and scraping
- Measuring cups and spoons
- Parchment paper for easy removal
Frequently Asked Questions
- Can I use low-fat cream cheese? Yes! Low-fat cream cheese can work, but expect a slightly different texture and flavor.
- How do I know when the cheesecake is done? It should be deeply browned on top and slightly jiggly in the center. It will continue to set as it cools!
- Can I freeze the cheesecake? Absolutely! Just wrap it tightly and store it in the freezer for up to 2 months. Thaw in the fridge before serving.
- How do I store leftovers? Keep them in an airtight container in the fridge for up to 5 days for the best taste!
- Can I use a different pan? Sure! You can use a round cake pan, but adjust the baking time as needed.
So, are you ready to give this burnt Basque cheesecake a whirl? I promise, it’s worth every minute in the kitchen! Don’t forget to share your creations with me on Pinterest. I can’t wait to see your delicious desserts and hear all about how they turned out! Happy baking!
