
My Favorite Crispy Mozzarella Sticks Recipe – Let’s Make Them Together!
Hey there! If you’re anything like me, you probably adore those crispy, melty mozzarella sticks that are perfect for snacking or sharing with friends. Honestly, making them at home is way easier than it sounds, and the results? Absolutely delicious! I love that you can customize the breading and serve them with your favorite marinara, making every bite just that little bit more special.
Why I Love Homemade Mozzarella Sticks (And You Will, Too!)
Now, before we dive into the recipe, I just want to say how fun and satisfying it is to make these from scratch. Sure, you can buy frozen ones at the store, but nothing beats the fresh, crispy coating and gooey center of homemade mozzarella sticks. Plus, you get to control the seasoning and oil quality, making it a tastier and even healthier option if you want.
Healthier Snack Goals: Nutritional Benefits
Mozzarella sticks might seem like a pure indulgence (and yes, they’re yummy comfort food!), but mozzarella cheese itself has some great nutritional perks. It’s a good source of protein and calcium, which are vital for strong muscles and bones. By making them at home, you can also choose to use whole-wheat bread crumbs or lower-fat cheese if you want to keep things lighter.
Easy Variations You Can Try at Home
- Spicy Kick: Mix some cayenne pepper or chili flakes into your bread crumbs for a bit of heat.
- Gluten-Free Version: Use gluten-free flour and bread crumbs – it works great and still tastes amazing!
- Cheese Mix-Up: Try using other melty cheeses like provolone or even a mix of mozzarella and cheddar for extra flavor.
- Baking Instead of Frying: If you want a less oily version, bake the mozzarella sticks at 400°F (200°C) for about 10-12 minutes till golden and crispy.
Your Step-by-Step Crispy Mozzarella Sticks Guide
Ingredients You’ll Need
- Mozzarella cheese sticks (or block mozzarella cut into sticks)
- 1 cup all-purpose flour
- 2 large eggs, beaten
- 1 ½ cups seasoned bread crumbs (Italian seasoned, or plain with salt, pepper, dried parsley, and oregano)
- Salt, to taste
- Black pepper, to taste
- Vegetable oil (or canola/peanut oil) for frying
- Marinara sauce, for serving
- Dried parsley flakes (optional, for garnish)
How to Make Them
- If you didn’t get pre-cut sticks, slice the mozzarella block into sticks about 3-4 inches long and ½ inch thick.
- Set up three shallow bowls: one with flour, one with the beaten eggs (seasoned with a pinch of salt and pepper), and one with your bread crumbs mixed with dried parsley and Italian herbs.
- Roll each mozzarella stick in flour first, shaking off any extra.
- Dip the floured stick into the beaten egg until it’s fully covered.
- Next, coat it thoroughly in the bread crumbs. For extra crunch, dip it again in egg and then into the bread crumbs one more time. This double coating is a game-changer!
- Lay the coated sticks on a baking sheet, and freeze them for at least 1 hour. This step helps stop cheese from oozing out when you fry.
- When you’re ready to fry, heat vegetable oil in a deep pan or fryer to 350°F (175°C). Make sure the oil is deep enough to cover the sticks completely.
- Carefully fry the mozzarella sticks in batches for about 1-2 minutes or until they turn golden brown and crispy. Don’t overcrowd the pan.
- Use a slotted spoon to remove the sticks and place them on paper towels to soak up any extra oil.
- Sprinkle with dried parsley flakes if you like a bit of color and extra flavor.
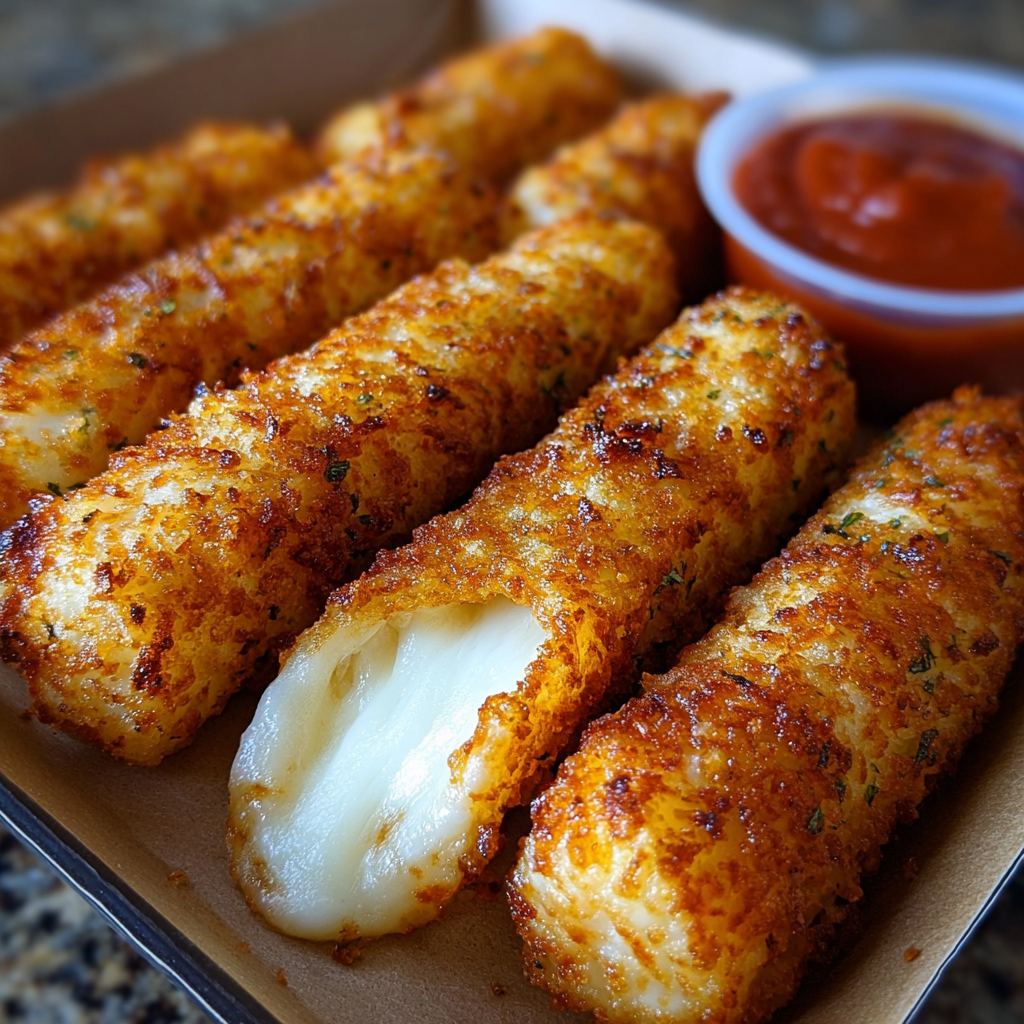
- Serve them warm with plenty of marinara sauce for dipping and enjoy that irresistible gooey, crunchy goodness!
My Top Tips for Mozzarella Success
- Freeze your sticks well — it’s the secret weapon to preventing a melted mess during frying.
- If you want extra crunchy coating, double dip in egg and bread crumbs like I mentioned. Trust me, it’s worth it!
- Don’t skip seasoning your eggs and bread crumbs – even just a pinch of Italian herbs and salt makes a huge difference.
- Use a thermometer to get your oil just right; too hot and the outside burns before the cheese melts, too cool and they’ll soak up oil.
- Serve immediately for the crispiest texture. If you need to hold onto them for a bit, keep them warm in a 200°F oven on a wire rack so they don’t get soggy.
Essential Equipment
Here’s a quick rundown of what will make this recipe easier and more fun to prepare:
- A sharp knife for slicing mozzarella sticks (if using block cheese)
- Three shallow bowls for your flour, beaten eggs, and bread crumbs
- A baking sheet and parchment paper for freezing
- A deep frying pan, skillet, or deep fryer
- A cooking thermometer to check oil temperature
- A slotted spoon or spider strainer for frying
- Paper towels to drain the fried sticks
Frequently Asked Questions
- Can I skip freezing the sticks before frying? Freezing is highly recommended because it helps the cheese stay inside the breading while frying. Without it, you’ll likely end up with melted cheese leaking out.
- What if I want to bake instead of fry? You can bake them in a preheated oven at 400°F (200°C) for about 10-12 minutes. Just make sure to flip halfway for even browning.
- Can I use gluten-free bread crumbs? Absolutely! Just swap in any gluten-free bread crumbs following the same steps and enjoy.
- What type of oil is best for frying? I usually go with vegetable, canola, or peanut oil because they have high smoke points and neutral flavors.
- How do I keep mozzarella sticks from sticking together in the freezer? Freeze them individually spaced on a baking sheet first, then transfer to a freezer-safe container or bag once they’re solid.
Give It a Go, and Share Your Mozzarella Magic!
I hope you try making mozzarella sticks at home soon—I promise the crispy, cheesy results are so worth it. If you do, please drop a comment or share your pics and variations on Pinterest. I love seeing how you make these little golden treasures your own!
