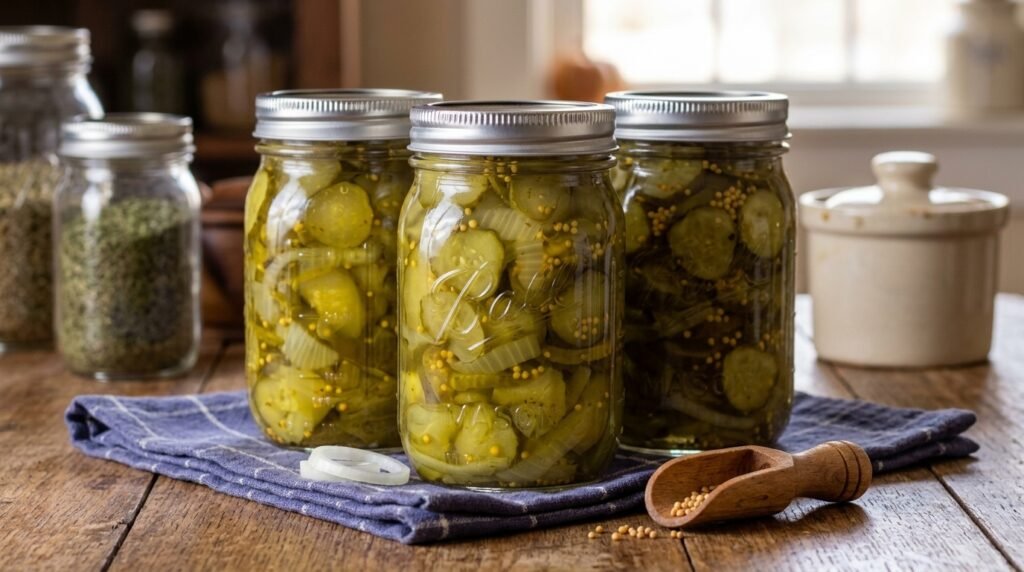
If you’ve been craving old fashioned bread and butter pickles with that sweet-tangy, garden-fresh flavor you remember from childhood, you are absolutely in the right place. I love recipes like this because they feel bigger than food. They bring back the kind of kitchen memories that stick with you forever: glass jars lined up on the counter, the scent of vinegar and spices in the air, and that first crisp bite straight from the fridge.
These pickles are just like grandma used to make: thin cucumber slices, tender onions, mustard seeds, turmeric, and a perfectly balanced brine that’s bright, sweet, and full of old-time charm. Looking at those beautiful jars filled with golden pickle chips on a rustic wooden table, you can almost hear the lids pinging as they cool. That little moment never stops feeling magical to me, and I think you’ll love it too.
What I especially love about this recipe is how approachable it is. You don’t need fancy ingredients, and the method is simple once you do it once. I’ll walk you through everything so you can make a batch for burgers, sandwiches, charcuterie boards, or just sneaking one cold slice at a time from the jar when nobody’s looking.
Quick Recipe Info Card
| Prep Time | 25 minutes |
| Cook Time | 15 minutes |
| Total Time | 4 hours 40 minutes |
| Servings | 32 servings (about 4 pint jars) |
| Difficulty | Easy |
Why You’ll Love It
- It tastes like true old fashioned bread and butter pickles, with that classic sweet-and-tangy balance.
- You only need simple pantry spices and fresh cucumbers.
- The recipe makes a generous batch, which is perfect for sharing or stocking your pantry.
- These pickles pair beautifully with burgers, barbecue, sandwiches, and cheese boards.
- You can enjoy them as refrigerator pickles or process them for longer storage.
- The flavor gets even better after a day or two, so they’re ideal for making ahead.
- They look gorgeous in jars, which makes them wonderful for gifting too.
Nutritional Benefits and Adaptable Variations
- Cucumbers are hydrating and naturally low in calories, so a little goes a long way.
- Onions add flavor, texture, and a small boost of antioxidants.
- Mustard seed and turmeric bring both bold flavor and traditional pickle color.
- You can use all white vinegar for a brighter, sharper finish or include apple cider vinegar for a warmer, homemade flavor.
- For a spicier batch, add a pinch of red pepper flakes to the brine.
- If you want a milder onion flavor, use sweet onions instead of yellow onions.
- For refrigerator pickles, you can get a little creative with spice additions, but for shelf-stable canning, I recommend sticking closely to the recipe.
Ingredients
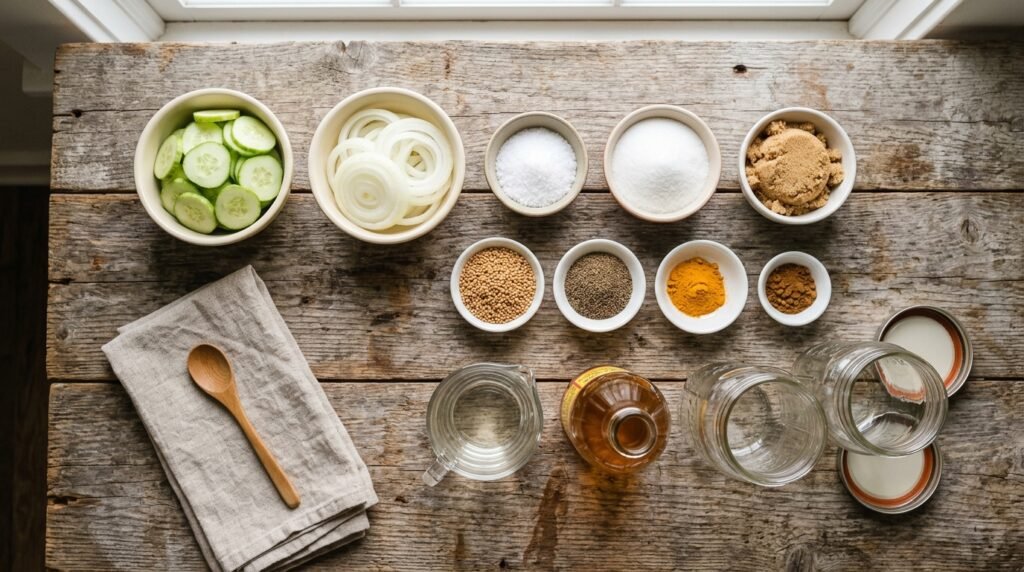
For the Cucumbers and Onions
- 4 pounds pickling cucumbers, thinly sliced into rounds
- 2 large sweet onions, thinly sliced
- 1/4 cup pickling salt
- 8 cups ice
For the Brine
- 2 cups white vinegar (5% acidity)
- 1 cup apple cider vinegar (5% acidity)
- 2 cups granulated sugar
- 1/2 cup light brown sugar
- 1 1/2 tablespoons mustard seeds
- 1 teaspoon celery seed
- 1 teaspoon ground turmeric
- 1/2 teaspoon black peppercorns
- 1/4 teaspoon ground cloves
For Canning or Storage
- 4 clean pint jars with lids and bands
Step-by-Step Instructions
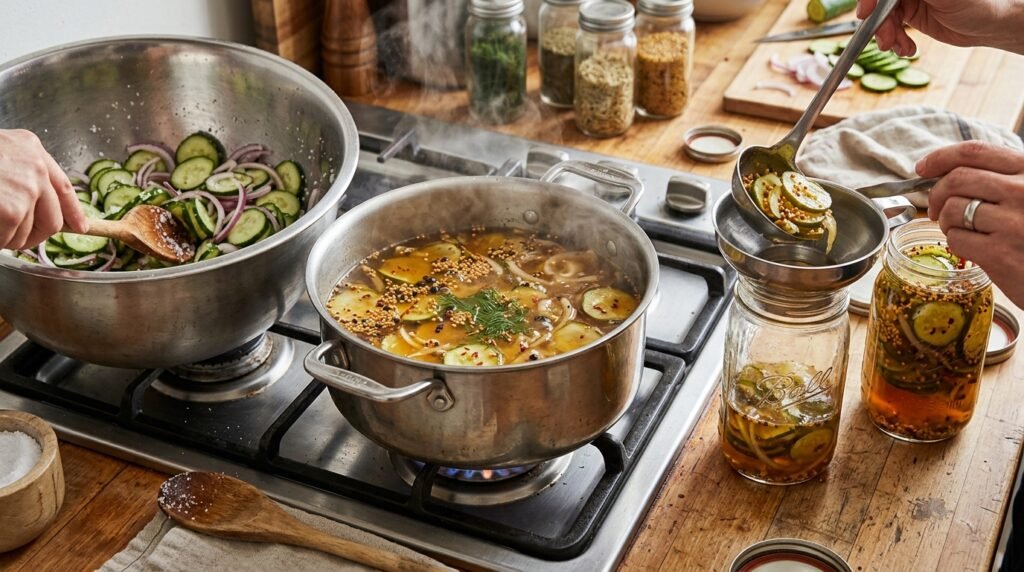
- Slice the vegetables. Wash the cucumbers well, then slice them into thin rounds, about 1/8-inch thick. Thinly slice the onions too. I like using a mandoline here because it keeps everything even, and even slices make a huge difference in the final texture.
- Salt and chill. Place the cucumber and onion slices in a large bowl or nonreactive pot. Sprinkle with the pickling salt and toss well. Cover with ice and let the mixture stand for about 3 hours. This step helps draw out excess moisture and gives you that crisp, classic pickle bite.
- Prepare your jars. If you plan to can the pickles for shelf storage, wash your jars, lids, and bands and prepare a boiling water canner according to safe canning directions. If you’re making refrigerator pickles, simply have clean jars ready.
- Rinse and drain. After the cucumbers have rested, drain them thoroughly and rinse well under cold water to remove excess salt. Drain again. I usually let them sit in a colander for a few minutes so the brine doesn’t get watered down.
- Make the brine. In a large nonreactive pot, combine the white vinegar, apple cider vinegar, granulated sugar, brown sugar, mustard seeds, celery seed, turmeric, peppercorns, and ground cloves. Bring the mixture to a gentle boil over medium heat, stirring until the sugar dissolves.
- Heat the vegetables. Add the drained cucumbers and onions to the hot brine. Stir gently and cook for 3 to 5 minutes, just until the vegetables are heated through and slightly translucent. Don’t overcook them. You want them crisp-tender, not soft.
- Pack the jars. Using a slotted spoon, divide the cucumbers and onions among the jars. Ladle the hot brine over the top, leaving about 1/2 inch of headspace. Remove any air bubbles, wipe the rims clean, and apply the lids and bands until fingertip tight.
- Process or refrigerate. For shelf-stable pickles, process the jars in a boiling water bath for 10 minutes, adjusting for altitude if needed. If you’re making refrigerator pickles, let the jars cool to room temperature, then transfer them to the refrigerator.
- Let the flavor develop. Technically, you can taste them within 24 hours, but I think old fashioned bread and butter pickles are best after at least 48 hours. If you can wait a full week, the flavor becomes even more mellow, sweet, and beautifully balanced.
Tips, Serving Suggestions & Substitutions
If you want the crunchiest pickles possible, start with very fresh pickling cucumbers. Soft or oversized cucumbers tend to give you softer results, and that’s not what we want here.
Try to slice the cucumbers evenly. Thin slices soak up the brine beautifully and give you that classic bread and butter pickle texture that’s perfect on sandwiches.
For the most traditional flavor, I like using both white vinegar and apple cider vinegar. The white vinegar keeps the brine bright, while the cider vinegar adds that warm, nostalgic depth that really makes these taste homemade.
If you’re serving these, I love them piled onto pulled pork sandwiches, chopped into tuna salad, tucked beside deviled eggs, or arranged on a snack board with cheddar, crackers, and smoked meats.
You can substitute yellow onions for sweet onions if that’s what you have. You can also add a pinch of red pepper flakes for a little kick. For canning safety, though, don’t reduce the vinegar or make major changes to the produce ratio. If you want to experiment more freely, make them as refrigerator pickles instead.
One more little tip from me: label the jars with the date. It sounds simple, but when you have several homemade jars in the fridge or pantry, it makes life so much easier.
Nutrition Information
| Nutrient | Per Serving (1/4 cup) |
|---|---|
| Calories | 55 |
| Carbohydrates | 13g |
| Sugar | 11g |
| Fiber | 0.5g |
| Protein | 0.3g |
| Fat | 0g |
| Sodium | 180mg |
Nutrition values are approximate and can vary depending on the exact size of your cucumbers, the brand of ingredients used, and how much brine is absorbed.
Storage & Make-Ahead Tips
If you process the jars properly in a boiling water bath, store them in a cool, dark place for up to 1 year. Once opened, keep them in the refrigerator and use within 1 month for the best flavor and texture.
If you skip the canning step and make refrigerator bread and butter pickles, store them in the fridge and enjoy within 6 to 8 weeks.
These are a fantastic make-ahead recipe because the flavor improves as they sit. I usually try to make them at least 2 days before I really want to serve them, and honestly, a week later they taste even more like the old fashioned bread and butter pickles I grew up with.
FAQ Section
1. Can I use regular garden cucumbers instead of pickling cucumbers?
Yes, you can, but pickling cucumbers usually give the best texture. If you use regular cucumbers, I recommend peeling them if the skins are thick and scooping out large seeds if they’re overly mature.
2. Do I have to can these, or can I just refrigerate them?
You can absolutely refrigerate them. If you’re not looking for shelf storage, refrigerator pickles are the easiest route. Just cool the jars and keep them chilled.
3. Why are my bread and butter pickles soft?
Usually it comes down to overripe cucumbers, skipping the salting step, slicing too thick, or cooking them too long in the brine. Fresh cucumbers and a short heating time make a big difference.
4. How soon can I eat them?
You can sample them after 24 hours, but I think they really start shining after 48 hours. If you can wait 5 to 7 days, the flavor becomes deeper and more balanced.
5. Why are they called bread and butter pickles?
The name is often linked to old-fashioned frugal meals, where sweet pickles were served with simple staples like bread and butter. No matter where the name started, the flavor has stayed a classic for generations.
Final Thoughts
I really hope you give these old fashioned bread and butter pickles a try, because they’re one of those recipes that feel special from the very first jar. They’re simple, deeply nostalgic, and honestly so satisfying to make with your own hands. When you open a jar later and hear that little pop, you’ll know exactly what I mean.
If you make them, I’d love to hear how they turned out for you. Leave a comment, share the recipe with someone who loves old-school homemade favorites, and don’t forget to save it to Pinterest so you can come back to it every pickle season.