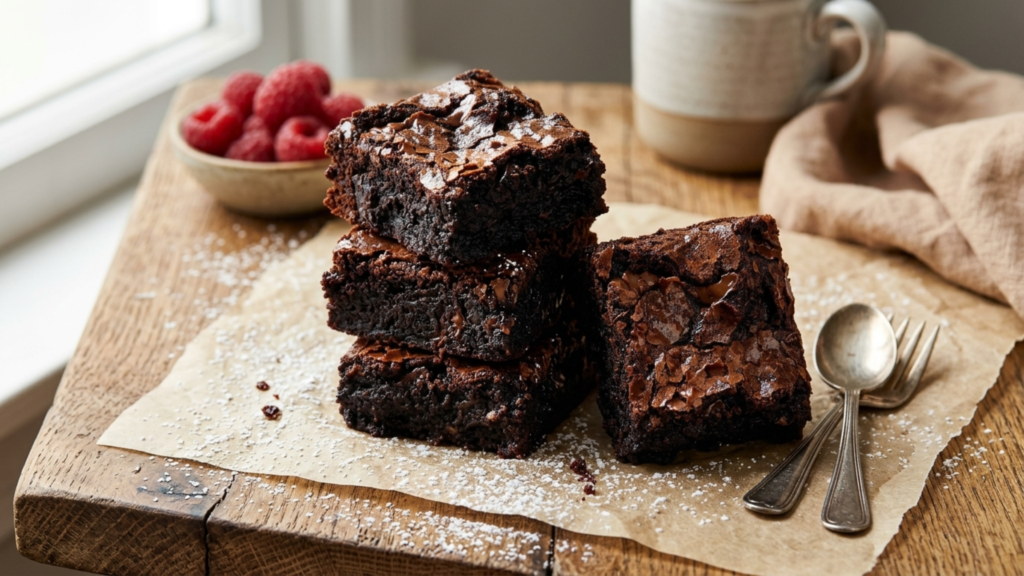
If you’ve been searching for the best brownie recipe, I’m genuinely excited to share this one with you. It’s everything I want in a classic brownie recipe: a glossy, paper-thin crackly top, a rich chocolate flavor, soft edges, and that perfectly fudgy center that makes you close your eyes after the first bite. This is the kind of homemade brownie recipe that feels dependable, easy, and just a little bit magical.
I keep coming back to this recipe because it gives you that bakery-style brownie look without any complicated steps. Think of those beautiful stacked brownies on a rustic wooden board, dusted with powdered sugar, with fresh raspberries nearby and a warm mug in the background. That cozy, irresistible feeling is exactly what this recipe delivers. Whether you’re baking for a weekend treat, a family gathering, a bake sale, or just because your chocolate craving is very real, these brownies always show up for you.
What I love most is that you don’t need a long list of fancy ingredients. You probably already have most of them in your kitchen. I’ll walk you through how to get that shiny top, how to avoid dry brownies, and how to make this classic brownie recipe your own with simple variations. If you want the best brownie recipe for fudgy, chocolate-packed squares you’ll make again and again, you’re in the right place.
Quick Recipe Info Card
| Prep Time | 15 minutes |
| Cook Time | 30 minutes |
| Total Time | 45 minutes, plus cooling |
| Servings | 16 brownies |
| Difficulty | Easy |
Why You’ll Love It
- It gives you that classic crackly brownie top everyone loves.
- The texture is deeply fudgy without feeling underbaked.
- You only need simple pantry staples.
- This best brownie recipe comes together in one bowl and one pan.
- It’s easy to customize with nuts, chocolate chunks, espresso, or flaky salt.
- The flavor is intensely chocolatey, rich, and satisfying.
- It works beautifully for parties, holidays, lunchbox treats, or late-night dessert cravings.
- You can make it ahead, freeze it, and still enjoy amazing brownies later.
Nutritional Benefits and Adaptable Variations
- Cocoa powder adds deep chocolate flavor along with natural antioxidants.
- Because these brownies are rich and satisfying, a small square often feels like the perfect portion.
- You can use high-quality dark chocolate chips for an even bolder chocolate profile.
- Swap in a 1:1 gluten-free flour blend if you need a gluten-free version.
- Use dairy-free butter and dairy-free chocolate chips to make the recipe dairy-free.
- Add chopped walnuts or pecans for crunch and a boost of healthy fats.
- Stir in espresso powder to intensify the cocoa flavor without making the brownies taste like coffee.
- Top with raspberries, strawberries, or a dusting of powdered sugar for an easy elegant finish.
Ingredients
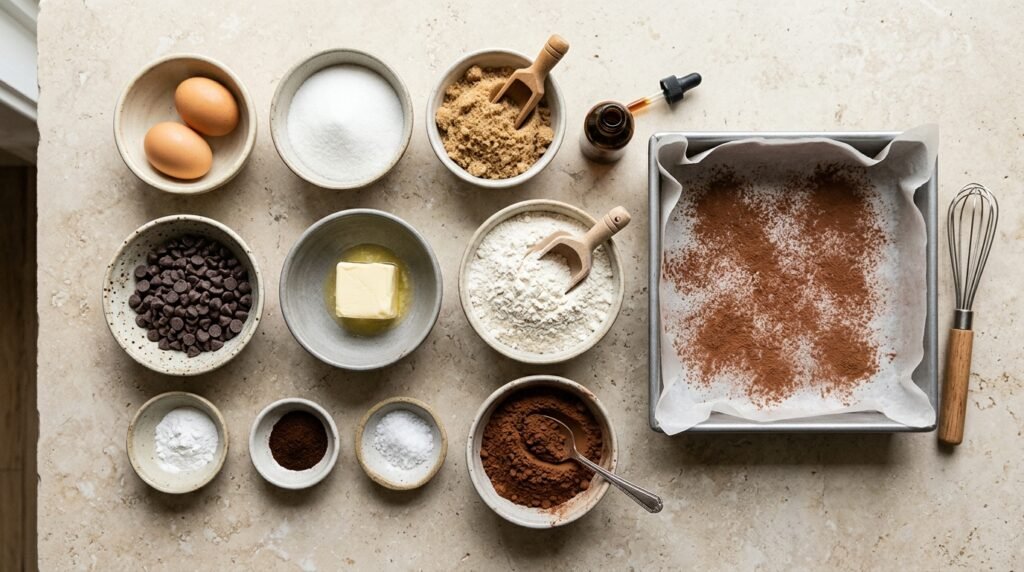
For the Brownie Batter
- 1 cup unsalted butter, melted and slightly cooled
- 2 cups granulated sugar
- 1/2 cup light brown sugar, packed
- 4 large eggs, room temperature
- 1 tablespoon pure vanilla extract
- 3/4 cup all-purpose flour
- 1 cup unsweetened cocoa powder
- 1 teaspoon fine sea salt
- 1 tablespoon espresso powder, optional but recommended
- 1/4 teaspoon baking powder
- 1 cup semi-sweet chocolate chips or chopped chocolate
Optional Toppings
- Extra chocolate chips for the top
- Flaky sea salt
- Powdered sugar for dusting
- Fresh raspberries for serving
Step-by-Step Instructions
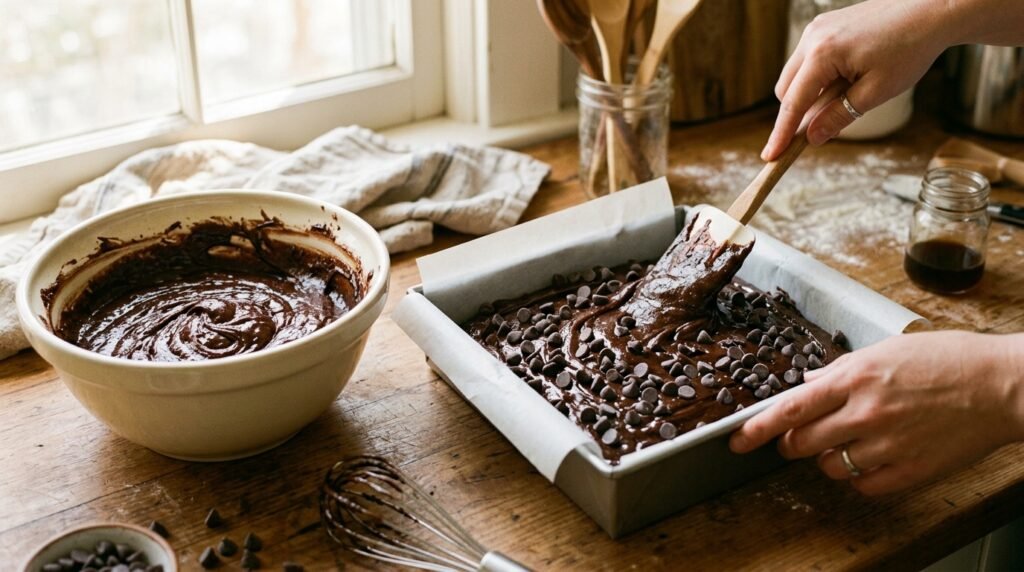
- Preheat and prepare the pan. Preheat your oven to 350°F. Line an 8×8-inch baking pan with parchment paper, leaving a little overhang on the sides so you can lift the brownies out easily later. Lightly grease the parchment if you want extra insurance.
- Mix the butter and sugars. In a large mixing bowl, whisk the melted butter, granulated sugar, and brown sugar together until smooth and glossy. This step helps dissolve some of the sugar and sets you up for that signature shiny top.
- Add the eggs and vanilla. Add the eggs one at a time, whisking well after each addition. Then whisk in the vanilla extract. Don’t rush this part. I like to whisk for about 30 seconds after each egg because it helps create that classic brownie texture and crackly surface.
- Combine the dry ingredients. In a separate bowl, whisk together the flour, cocoa powder, salt, espresso powder, and baking powder. This makes sure the cocoa breaks up evenly and you won’t end up with little dry pockets in the batter.
- Fold everything together. Add the dry mixture to the wet mixture and fold gently with a spatula until just combined. The batter will be thick, dark, and luxurious. Fold in the chocolate chips. Be careful not to overmix, because that can make the brownies less tender.
- Spread into the pan. Transfer the batter to your prepared pan and smooth the top. If you want extra chocolate on top, sprinkle a few more chips over the batter. A tiny pinch of flaky salt is also wonderful here.
- Bake. Bake for 28 to 32 minutes, or until the edges are set and the center no longer looks wet. A toothpick inserted near the center should come out with moist crumbs, not raw batter. If you wait for a completely clean toothpick, the brownies may be overbaked.
- Cool completely. Let the brownies cool in the pan before lifting them out. I know it’s hard to wait, but this is one of the secrets to clean slices and the best fudgy texture. If you want especially neat squares, chill them for 30 minutes after cooling.
- Slice and serve. Use a sharp knife, wiping it clean between cuts. Dust with powdered sugar if you like, and serve with fresh raspberries, coffee, or a scoop of vanilla ice cream.
Tips, Serving Suggestions & Substitutions
- For the shiny top: Whisk the eggs and sugar mixture well. That glossy surface comes from properly combining the sugar and eggs.
- For fudgy brownies: Do not overbake. Pull them out when the center is just set and a toothpick has moist crumbs.
- For clean slices: Cool completely, then chill briefly before cutting.
- Serving idea: Warm a brownie slightly and top it with vanilla ice cream and a drizzle of chocolate sauce for an easy restaurant-style dessert.
- Cozy pairing: Serve with hot coffee, espresso, or a cold glass of milk.
- Berry pairing: Fresh raspberries or strawberries add a bright contrast to the rich chocolate.
- Nutty variation: Fold in 3/4 cup chopped walnuts or pecans.
- Extra rich variation: Use dark chocolate chunks instead of semi-sweet chips.
- Gluten-free option: Replace the all-purpose flour with your favorite 1:1 gluten-free baking blend.
- Dairy-free option: Use a good plant-based butter and dairy-free chocolate chips.
- Flavor twist: Add 1/2 teaspoon peppermint extract or a pinch of cinnamon for a fun seasonal change.
Nutrition Information
| Nutrient | Per Serving |
|---|---|
| Calories | 240 |
| Carbohydrates | 31g |
| Protein | 3g |
| Fat | 13g |
| Saturated Fat | 8g |
| Sugar | 23g |
| Fiber | 2g |
| Sodium | 150mg |
Nutrition values are approximate and can vary based on the exact ingredients and brands you use.
Storage & Make-Ahead Tips
One of the best things about this classic brownie recipe is that it stores beautifully. Keep the brownies in an airtight container at room temperature for up to 4 days. If your kitchen runs warm, you can refrigerate them for up to 1 week, though I like to let them sit at room temperature for a few minutes before serving so they soften slightly.
For longer storage, freeze individual brownie squares or the whole slab tightly wrapped for up to 3 months. I usually wrap them in plastic wrap, then place them in a freezer-safe container or zip-top bag. When you’re ready to enjoy them, thaw at room temperature. They’re honestly fantastic straight from the fridge too if you love a denser, fudgier bite.
If you want to make dessert ahead for a party or holiday, bake the brownies a day in advance. In fact, I think the flavor gets even better after resting overnight. Just wait to dust them with powdered sugar until right before serving for the prettiest finish.
FAQ Section
1. How do I get that shiny, crackly brownie top?
The key is whisking the melted butter with the sugars well, then thoroughly whisking in the eggs one at a time. That combination helps create the delicate, glossy top you see in the best brownie recipe photos.
2. Can I make this classic brownie recipe without brown sugar?
Yes, you can. If you don’t have brown sugar, use more granulated sugar instead. The brownies will still taste delicious, though the brown sugar adds a little extra moisture and subtle caramel depth.
3. Should brownies still seem a little soft in the center when I take them out?
Yes. Brownies continue to set as they cool. You want the center to look set but still slightly soft, with a toothpick showing moist crumbs. If the toothpick is totally clean, the brownies may be more cakey than fudgy.
4. Can I double this recipe?
Absolutely. Double everything and bake the batter in a 9×13-inch pan. Start checking for doneness around 32 minutes, but it may need a little longer depending on your oven.
5. What kind of cocoa powder works best?
Unsweetened natural cocoa powder works beautifully here, but Dutch-process cocoa can also give you a darker, smoother chocolate flavor. Either one will make a delicious batch of homemade brownies.
Final Thoughts
I really believe this is the kind of dessert recipe every home baker should have tucked away. It’s easy enough for a casual weekday bake, impressive enough for guests, and satisfying enough to earn a permanent spot in your favorites folder. If you’ve been hoping to find the best brownie recipe with true classic brownie recipe flavor and texture, I think this one will make you very happy.
If you try it, I’d love to hear how it turned out for you. Leave a comment, share it with a fellow chocolate lover, and save it to Pinterest so you can come back to it whenever the brownie craving hits. Happy baking!