If you need a dessert that gets people hovering around the table before dinner is even served, these Homemade S’mores Cookie Bars are exactly the kind of recipe I’d make. They have everything you love about classic campfire s’mores—gooey marshmallows, melty chocolate, and graham cracker flavor—but in an easy, sliceable bar that travels beautifully for parties, holidays, school events, and casual backyard gatherings. When I want a sweet treat that feels nostalgic and still feeds a crowd, this is one of my favorite potluck desserts to bake.
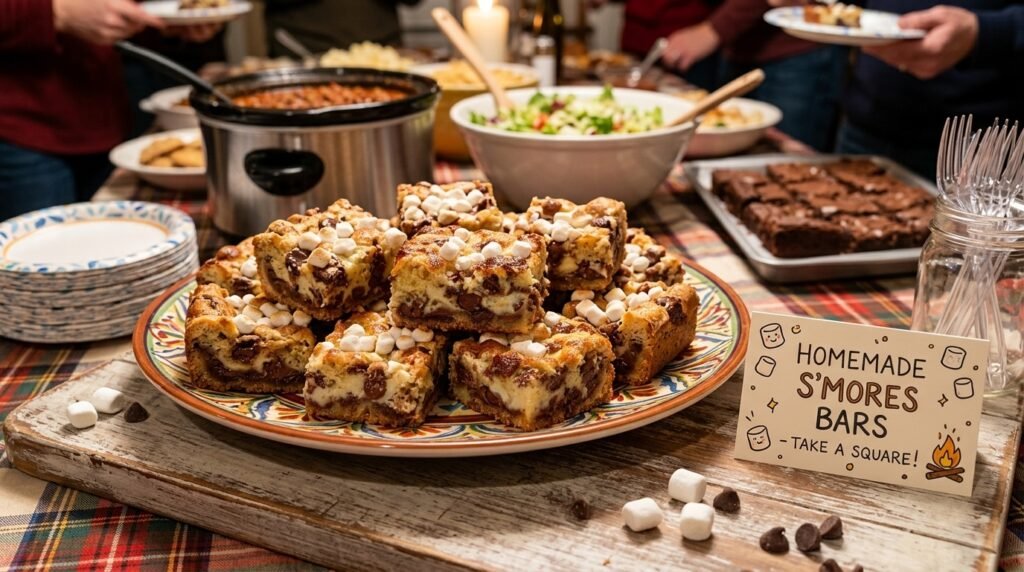
I especially love how these bars fit right into that cozy potluck scene: a big platter piled high with golden squares, mini marshmallows peeking out on top, and everyone grabbing “just one” before coming back for a second. If you’ve ever wanted a recipe that looks homemade, tastes bakery-worthy, and doesn’t require a campfire or complicated prep, you’re going to be so happy with this one.
What makes these Homemade S’mores Cookie Bars for Potluck Fun such a winner is the texture. The base is soft and buttery like a chocolate chip cookie, the middle is rich with chocolate and marshmallow, and the graham cracker crumbs bring that unmistakable s’mores flavor into every bite. They’re cheerful, crowd-friendly, and honestly one of the easiest ways I know to bring a little fun to the dessert table.
Quick Recipe Info Card
| Prep Time: 20 minutes | Cook Time: 28 minutes |
| Total Time: 48 minutes, plus cooling | Servings: 24 bars |
| Difficulty: Easy | Best For: Potlucks, parties, bake sales |
Why You’ll Love It
- It captures all the flavor of traditional s’mores without needing a fire pit.
- These bars are easy to transport, making them ideal for potlucks and parties.
- You can slice them neatly ahead of time and serve a crowd with almost no stress.
- The cookie bar base stays soft and chewy, even a day later.
- Mini marshmallows, chocolate chips, and graham cracker crumbs create a nostalgic flavor everyone recognizes.
- This is a simple one-pan dessert, so cleanup is wonderfully manageable.
- You can customize the chocolate, add extra crunch, or make them a little more grown-up with a sprinkle of flaky salt.
Nutritional Benefits and Adaptable Variations
- Portion-friendly bars make it easy to serve a satisfying dessert without cutting oversized slices.
- Chocolate adds a small amount of iron, and using dark chocolate can slightly boost antioxidants.
- Milk, eggs, and butter contribute a little protein and calcium in each serving.
- You can swap in gluten-free graham crackers and a 1:1 gluten-free flour blend for a gluten-free version.
- For a richer flavor, use chopped dark chocolate instead of milk chocolate or semisweet chips.
- If you want a nutty variation, stir in chopped pecans or walnuts for crunch.
- For a holiday version, add crushed peppermint candies on top after baking.
- You can make these a little less sweet by reducing the mini marshmallows on top and using bittersweet chocolate.
Ingredients
For the Cookie Bar Dough
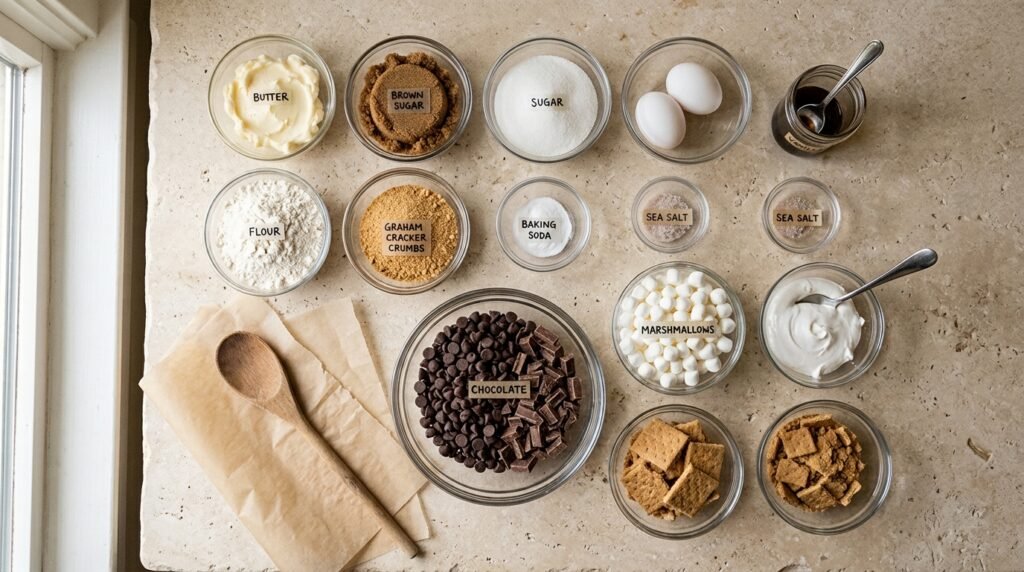
- 1 cup unsalted butter, softened
- 1 cup packed light brown sugar
- 1/2 cup granulated sugar
- 2 large eggs
- 2 teaspoons vanilla extract
- 2 1/4 cups all-purpose flour
- 1 cup graham cracker crumbs
- 1 teaspoon baking soda
- 1/2 teaspoon fine sea salt
- 1 1/2 cups semisweet chocolate chips
- 1 cup chopped milk chocolate bars or chocolate chunks
For the Filling and Topping
- 3/4 cup marshmallow creme
- 1 1/2 cups mini marshmallows, divided
- 4 full graham crackers, roughly broken into small pieces
- 2 tablespoons extra chocolate chips for topping, optional
- Flaky sea salt for finishing, optional
Step-by-Step Instructions
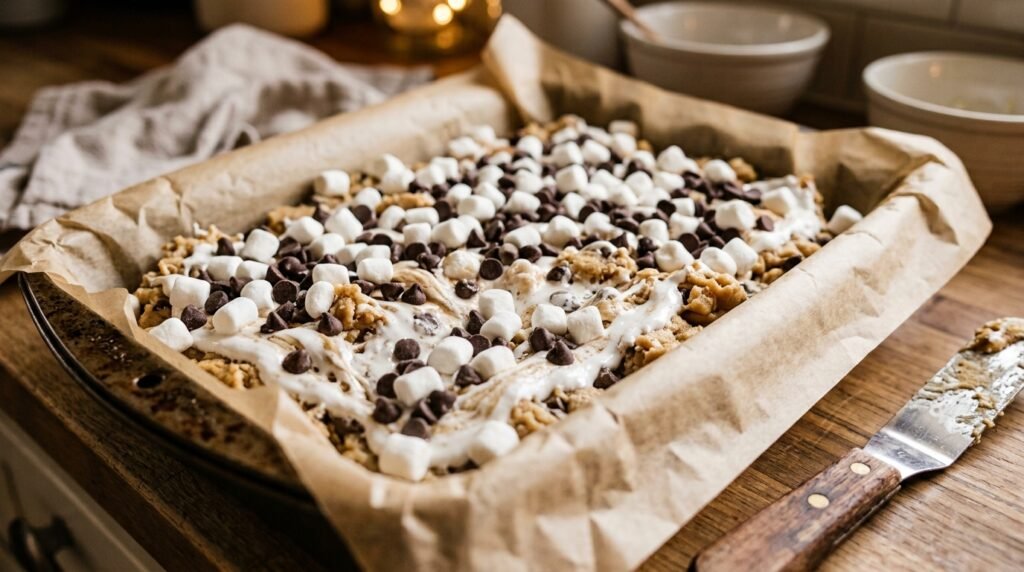
- Prep your pan and oven. Preheat your oven to 350°F. Line a 9×13-inch baking pan with parchment paper, leaving enough overhang on the sides to lift the bars out later. This makes slicing so much easier.
- Cream the butter and sugars. In a large mixing bowl, beat the softened butter, brown sugar, and granulated sugar until the mixture looks light and fluffy. I usually give it about 2 to 3 minutes with a hand mixer.
- Add the eggs and vanilla. Mix in the eggs one at a time, then add the vanilla extract. Scrape down the bowl so everything blends evenly.
- Combine the dry ingredients. In a separate bowl, whisk together the flour, graham cracker crumbs, baking soda, and salt. This helps distribute the leavening and keeps the bars from baking unevenly.
- Make the dough. Add the dry ingredients to the wet ingredients and mix just until combined. Fold in the chocolate chips and chopped chocolate. The dough will be thick, soft, and slightly sticky.
- Layer the bars. Press about two-thirds of the dough evenly into the bottom of the prepared pan. Gently spread the marshmallow creme over the dough. Sprinkle on 1 cup of the mini marshmallows and the broken graham cracker pieces. Drop the remaining dough over the top in small flattened pieces instead of trying to spread one solid layer.
- Add the final topping. Scatter the remaining 1/2 cup mini marshmallows and the extra chocolate chips on top. This gives you that pretty, bakery-style finish once the bars bake.
- Bake until golden. Bake for 25 to 28 minutes, or until the top is lightly golden and the center looks just set. If you want deeper toasted marshmallows, broil for 20 to 30 seconds at the very end, but watch closely because marshmallows brown fast.
- Cool completely. Let the bars cool in the pan for at least 45 minutes before lifting them out. I know it’s hard to wait, but cooling helps the layers settle so you get cleaner slices.
- Slice and serve. Cut into 24 squares. For neat edges, use a sharp knife and wipe it clean between cuts. For extra flair, finish with a tiny pinch of flaky sea salt.
Tips, Serving Suggestions & Substitutions
Helpful Tips
- Use parchment paper so you can lift the whole slab out before slicing.
- If your marshmallow creme is hard to spread, warm it for a few seconds so it loosens up.
- Don’t overbake. The bars continue to set as they cool, and a slightly soft center keeps them chewy.
- For cleaner potluck presentation, chill the bars for 20 minutes after cooling, then slice.
Serving Suggestions
- Arrange the bars on a large platter with a sprinkle of mini marshmallows for a fun party look.
- Serve them with cold milk, iced coffee, or hot chocolate for a cozy dessert table.
- For a summer cookout, pair them with fresh strawberries or vanilla ice cream.
- At holiday gatherings, stack them on a cake stand and dust the platter lightly with graham cracker crumbs.
Easy Substitutions
- Swap semisweet chips for dark chocolate, peanut butter chips, or chopped candy bars.
- Use gluten-free all-purpose flour and gluten-free graham crackers if needed.
- Replace marshmallow creme with extra mini marshmallows if that’s what you have on hand, though the center will be less swirly.
- If you prefer a thicker graham flavor, add an extra 1/4 cup graham cracker crumbs and reduce the flour slightly.
Nutrition Information
| Nutrient | Per Serving |
|---|---|
| Calories | 265 |
| Carbohydrates | 35g |
| Protein | 3g |
| Fat | 13g |
| Saturated Fat | 8g |
| Sugar | 22g |
| Fiber | 1g |
| Sodium | 170mg |
Nutrition values are estimates and can vary based on ingredient brands, portion size, and substitutions.
Storage & Make-Ahead Tips
One of the best things about these Homemade S’mores Cookie Bars is how well they fit into a busy schedule. If I’m baking for a potluck, I usually make them the night before, let them cool completely, then slice and store them in an airtight container. By the next day, they’re still soft, chewy, and easy to transport.
- Room temperature: Store in an airtight container for up to 3 days.
- Refrigerator: Keep for up to 5 days if your kitchen runs warm. Let them come to room temperature before serving for the best texture.
- Freezer: Freeze sliced bars in a single layer, then transfer to a freezer-safe container for up to 2 months.
- Make-ahead tip: Bake, cool, and slice the bars up to 24 hours in advance. Place parchment between layers so they don’t stick together.
- To refresh: Warm a bar in the microwave for 8 to 10 seconds for that gooey, just-baked feel.
FAQ Section
1. Can I make these Homemade S’mores Cookie Bars ahead for a potluck?
Absolutely. In fact, I think they’re even easier to serve when made ahead because the bars have time to set. Bake them the day before, cool completely, slice, and store in an airtight container until you’re ready to go.
2. Why did my bars fall apart when I cut them?
The most common reason is slicing too soon. The marshmallow layer needs time to cool and settle. Let the bars cool fully, and if you want extra tidy squares, chill them briefly before cutting.
3. Can I use regular marshmallows instead of mini marshmallows?
Yes, but I recommend cutting regular marshmallows into smaller pieces so they distribute more evenly. Mini marshmallows are just easier and give you a more consistent topping.
4. Can I freeze s’mores cookie bars?
Yes. Once cooled, wrap the bars well or store them in a freezer-safe container with parchment between layers. Thaw at room temperature, or warm individual bars for a few seconds in the microwave.
5. What’s the best chocolate to use in this recipe?
I like a mix of semisweet chips and chopped milk chocolate because it tastes the most like classic s’mores. If you prefer a deeper flavor, use dark chocolate or bittersweet chocolate chunks instead.
Final Thoughts
If you’ve been looking for a dessert that feels playful, nostalgic, and genuinely practical for sharing, I really think these Homemade S’mores Cookie Bars for Potluck Fun are worth baking. They’re simple enough for a weekday prep session, pretty enough for a party platter, and delicious enough that people will absolutely ask you for the recipe.
If you make them, I’d love to hear how they turned out for you. Leave a comment with your favorite variation, share this recipe with a friend who always signs up to bring dessert, and don’t forget to save it to Pinterest so you can come back to it for your next potluck, cookout, or holiday gathering.