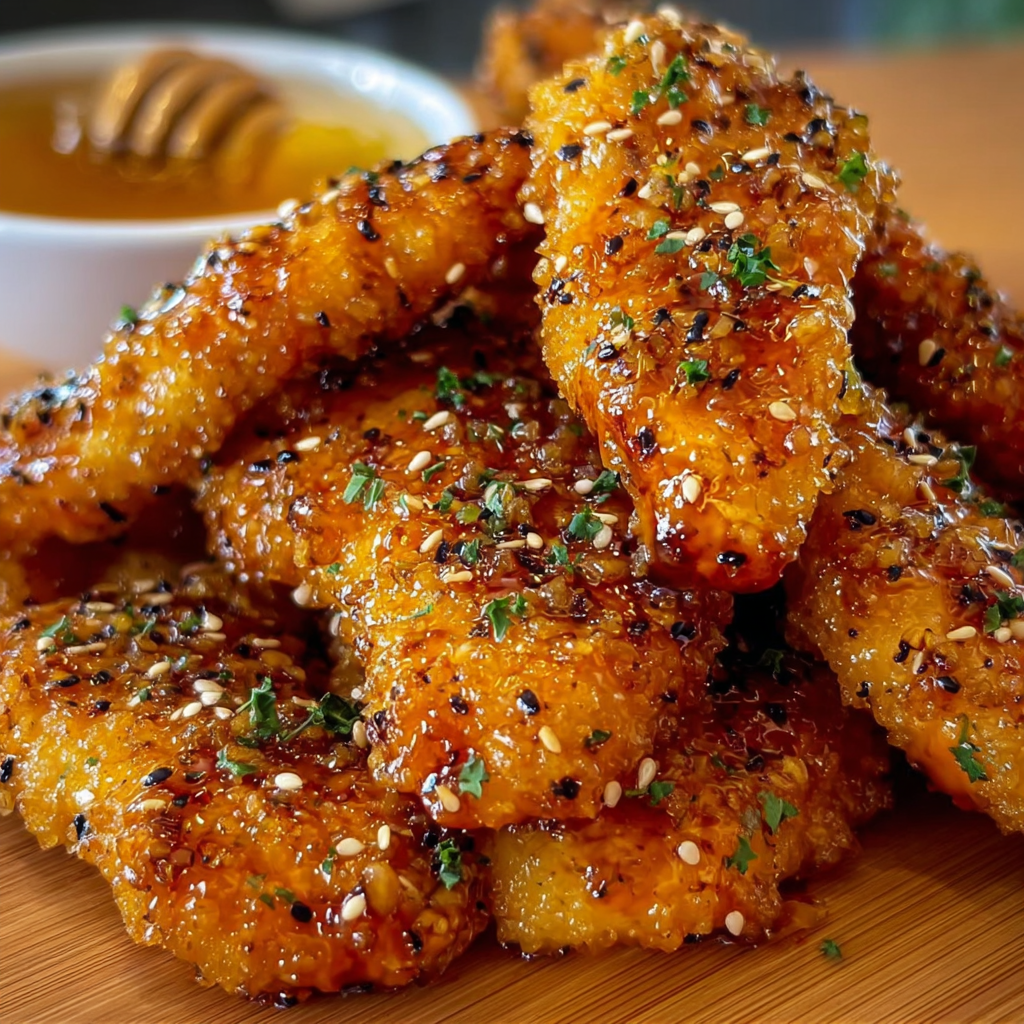
Hey There! Let’s Make Crispy Honey Butter Garlic Chicken Tenders
Hi! If you’re anything like me, you know that crispy chicken tenders are basically a universal comfort food. They’re crunchy, juicy, and perfect for dipping or just eating straight up. But these aren’t just any chicken tenders—this recipe is all about that amazing honey butter garlic glaze that takes the flavor to a whole new level. Plus, they’re made in the air fryer, so you get that satisfying crunch without deep frying and all the extra oil. I love how easy and quick this recipe is, and I’m sure you’ll enjoy it just as much as I do!
Nutritional Benefits of This Recipe
One of the great things about air-fried chicken tenders is that they allow you to enjoy that crispy texture while using far less oil than traditional deep frying. This means fewer calories and less fat, making it a lighter option for a favorite comfort food. Plus, chicken tenders are a great source of lean protein, which helps keep you energized and satisfied.
The honey adds a natural sweetness and contains antioxidants, while the garlic supports your immune system and has anti-inflammatory properties. Topping the dish with fresh parsley or cilantro brings in some vitamins and fresh herbal flavor. So, while this is definitely a treat, it’s also got some good-for-you elements to feel good about!
Here’s How You Make This Crispy Honey Butter Garlic Chicken Tender Recipe
What You’ll Need
- 1 pound chicken tenders
- 1/2 cup all-purpose flour or cornstarch (your choice)
- 2 large eggs
- 1 cup panko breadcrumbs
- 1 teaspoon garlic powder
- 1 teaspoon paprika
- 1/2 teaspoon salt
- 1/2 teaspoon black pepper
- Cooking oil spray (olive oil or vegetable oil works great)
- 1/4 cup honey
- 3 tablespoons unsalted butter
- 2 cloves garlic, minced
- 1 tablespoon sesame seeds (mix white and black if you can)
- 1-2 tablespoons fresh parsley or cilantro, finely chopped for garnish
Cooking Instructions
- First, preheat your air fryer to 400°F (200°C) for about 5 minutes. This gets everything hot and ready for that crispy finish.
- Now, set up your coating station. Put the flour or cornstarch in one shallow dish. Beat the eggs in a second bowl. In a third bowl, mix together the panko breadcrumbs, garlic powder, paprika, salt, and black pepper.
- Take your chicken tenders and pat them dry with paper towels—this helps the coating stick better!
- Dredge each tender in the flour or cornstarch, shaking off any extra. Then dip it in the beaten eggs, and finally coat it well with the seasoned panko. Press gently so the crumbs stick nicely.
- Arrange the coated chicken tenders in a single layer in your air fryer basket. Don’t crowd them, so air can circulate and crisp them up properly.
- Lightly spray the tenders with cooking oil spray to help achieve that golden, crispy texture.
- Air fry at 400°F for 8-10 minutes. About halfway through, flip each tender so they cook evenly on both sides. You’ll know it’s ready when they’re golden brown and have reached an internal temperature of 165°F.
- While the chicken cooks, make the honey butter garlic glaze! Melt the butter in a small saucepan over medium heat, add the minced garlic, and cook about 1 minute until you smell that delicious aroma.
- Stir in the honey and warm it through for another minute. Then take the glaze off the heat so it’s ready for the chicken.
- When the chicken tenders are done, toss them gently in a large bowl with the honey butter garlic glaze until they’re all coated beautifully.
- Transfer them to a serving platter, sprinkle on the sesame seeds and chopped parsley or cilantro for a fresh, colorful touch.
- Serve immediately, and if you like, offer extra honey or your favorite dipping sauce on the side!
Pro Tips For Perfect Chicken Tenders Every Time
- Dry the chicken well: This is key to getting the coating to stick and crisp nicely in the air fryer.
- Don’t overcrowd the air fryer basket: Leaving space between tenders helps the hot air circulate and keeps the coating crispy.
- Turn halfway through cooking: Flipping ensures you get golden crispiness all around.
- Use cooking spray sparingly: A light mist helps crisp without making the tenders soggy.
- Make the glaze while chicken cooks: This saves time and makes sure everything is warm and ready to serve together.
Essential Equipment
Before you start, here’s a handy checklist of what will make this recipe super easy and fun:
- An air fryer (preheated to 400°F for best results!)
- Three shallow bowls or dishes for the flour/cornstarch, eggs, and breadcrumb mixture
- A small saucepan for the honey butter garlic glaze
- Kitchen tongs or a fork for flipping chicken
- A meat thermometer to check doneness (optional but helpful!)
- A serving plate and small bowls for dipping sauces or extra honey
Frequently Asked Questions About This Recipe
- Can I use chicken breasts instead of tenders? Absolutely! Just slice the breasts into strips about the size of tenders, and cook for a few extra minutes if needed to reach 165°F internally.
- Is cornstarch better than flour for the coating? Both work well. Cornstarch tends to give an extra crispy texture, but flour is fine if that’s what you have on hand.
- Can I make this recipe gluten-free? Yes! Use gluten-free flour or cornstarch and gluten-free panko breadcrumbs to keep it crispy and safe.
- What can I serve with these chicken tenders? They’re great with a simple green salad, steamed veggies, rice, or even as part of a sandwich with some lettuce and tomato.
- How do I store leftovers? Keep any extras in an airtight container in the fridge for up to 3 days. Reheat in the air fryer or oven to bring back the crunch!
Ready to Try This Delicious Recipe?
I hope you have fun making and eating these crispy honey butter garlic chicken tenders as much as I do! They’re a real crowd-pleaser and perfect for busy weeknights or casual get-togethers. If you give this recipe a whirl, please share your photos and experiences with me on Pinterest—I always love seeing your kitchen creations and hearing your thoughts. Happy cooking!